09 September 2023

Building a Storage Platform

Since we need a space to store some of our personal gear, food, recovery gear, tools and the like, we took the rear seats out of our Jeep Gladiator. The rear area is surprisingly roomy and opens up significant space. The main problem is, that the original trim is rather bulky and in the way of what we plan to do, so we took pretty much all of it out, including the subwoofer, that takes some of the space behind the rear seats. 

Once everything was out, we put some sound deadening mat in. We also added 3M Thinsulate as well as some foam blocks to prevent rattling of the new, straight, rear panel. The new panel is made from 6mm Baltic Birch plywood, cut to fit around the various welded in holders for the rear seats as well as child seats.

The raw new panel

To mount the new panel, we cut some aluminum brackets, which we attached to the bolts that hold the rear part of the hardtop roof in place.

Rear panel brackets

The finished panel looks pretty nice and makes the truck significantly less noisy.

Now, with this out of the way, we started building mounting brackets for the rear seat platform. They attach to the original mount points for the rear seats, so will definitely provide the strength to support our gear as well as a 12V fridge.

It took some time to sort out the correct height, so that our fridge would still open fully without hitting the rollbar of the Jeep. We still got it just slightly wrong and left more space than needed at the top. We could have built the platform a bit higher, but in the end, it works.

The final platform, in basic form.

Since we wanted this to be a nice fit, there was a lot of small detail work to be done to get around all the nooks in the truck:

Working around all the details in the truck


And the final platform, with the mounting for our fridge in place. We'll likely finish the platform in a few weeks when we have tested it properly and are relatively sure that we don't want to add anything. 

The l-track will take some tiedown rings and the fridge will sit with its feet in the small cutouts in the alignment panel. It'll be tied down with straps and should be safe and stable there without problems. Testing to come.

26 August 2023

Mozilla Thunderbird – Finally Modernized

If you are like me and live in the past – meaning, you use email as the preferred communication over highly intrusive other  options like text message or "business chats", you will like this: Mozilla Thunderbird, long stuck in the design of the early 90s, has finally been modernized to a reasonable user interface.

Thunderbird had been an eye sore for more than two decades, it has never been "good looking", and while it was functional to the standards of the early 90s, it just didn't evolve beyond that. That sad time is over now. Thunderbird 115 ("Supernova") is out and it really presents a completely new look and feel. 

There is still a lot of work to be done, especially in the areas of making search and settings more user friendly, but the primary UI is competitive again. It may not be as intuitive or user friendly as macOS Mail, but it isn't all that far behind. And given that Microsoft has been moving steadily backwards with their latest versions of Outlook, Thunderbird has become a viable alternative for many.

Available functional as well as user friendly email applications have long been a disaster on Linux as well, and the release of this latest Thunderbird makes Linux an actual alternative to those refusing the utter catastrophies of webmail or still being pointed to mutt as a viable email client – talk about going back to the 70s ...

So, if you're as intrigued as I am, check out the new features here:

https://www.thunderbird.net/en-US/thunderbird/115.0/whatsnew/

I've been using Thunderbird Supernova for a while now, starting with daily and then beta releases, and it has been stable and usable.

22 August 2023

Review: RAM Mount Tough Track

Reasoning

I was going back and forth between the various options for phone, camera, navigation device holders and ended up deciding on Ram Mount since I have so much of their stuff already, like device cradles, flexible mounts, and so on. 

Quality

The base plate that gets screwed to the Jeep is metal, but the track portion weirdly is plastic. Not too happy about the plastic part, otherwise, no complains. 

Installation

Dead simple. Take out two screws from the dash, insert base plate where the track is already mounted (hard to get to the screws when mounting the track later), put screws back in, done. 

Then Ram balls can be placed easily. 

In Use

I've attached three balls at this point, one of driver's phone, one for passenger's phone, one for a Garmin Inreach Mini (not shown). I've re-used existing cradles and it works reasonably well so far. Much cheaper than the Bulletpoint mount, maybe slightly less flexible at the moment, the flexible mount I had ordered didn't work out (review of that coming up as a warning to others). The rail sticks up a bit higher than I would like, overall, not a great impression, but it does work reasonably well. 

Also, since the rail is relatively close to the windshield, it interferes with out windshield shade, which we put in to reflect some of the sun when standing outside. Also, the RAM arms often can't be the short ones, depending on the mount, and that means more vibration.

Overall

Rating: 3/5 – could use a better flexible mount option, track should be metal, should be better fit 


21 August 2023

Jeep Gladiator – First Modifications

As the first steps, we have added the things we thought any vehicle should have from the factory these days. 

The Bolt Hood Lock

Installation

It's surprisingly simple to install.

  1. You "prime" the lock with your vehicle's key, this is a five second job, but can't be undone once set.
  2. Remove the plastic holders of the front grill at the top. Pull grill forward enough to have access.
  3. Rivet the lock into place with the rivets that came in the kit. You need a heavy duty rivet tool, I bought one on Amazon since I didn't have one yet, and it did work, although it had it's difficulties with the 1/4 rivets.
  4. Cut out the grill to fit.
  5. Re-attach with the new, included, plastic fasteners.
  6. Done.

It looks stock, it works with the vehicle key, it doesn't seem to be easily defeated (although I could be wrong there), so it should keep curious fingers away. The metal part is heavy duty, appears to be very high quality, the parts are well made and fit perfectly, comes with a rubber protector. There isn't really much else to say about it, other than it "just works".

This was a simple, very nice, and easy modification, that I can highly recommend.

Rating: 5/5 – would definitely install again


Bolt Hood Lock


Mopar Locking Diesel Fuel Cap

Reason to install

This has been bugging us on our 4Runner as well and while I fully understand that thieves will just drill the tank, I don't care about "professional" gas or diesel thieves. I care about a-holes dropping stuff in the tank because for some reason, and possibly in their twisted minds, don't like us or our vehicle.

So, this is to keep less determined people away from things that shouldn't be in easy access anyways. Not a safety measure, an anti-idiot measure.

Quality

The fuel cap itself feels cheap and very plasticy, it rattles a bit and is fully plastic, the lock cylinder feels pretty solid, I guess it's the same used for the doors, just repurposed for this cap.

Installation

Installation time is mainly used for keying the lock cylinder to the vehicle's key, Quadratec has a good video on how to do that in a pretty much fool-proof way. It's still a "one way installation", so if the lock cylinder is inserted into the gas cap and not keyed correctly, you're done, you have just wasted more than $100. I don't get why they don't included a small slot in the cap where the "cylinder retainer" could be released when the cap is open, but it is what it is.

Since I have re-keyed many such cylinders before (mostly on BMW motorcycle luggage), I was well aware of the process, so it was a simple job of just sorting through the parts, arranging them on a paper towel, installing the springs, lock plates, and plastic retainer, then inserting the cylinder into the cap and installing that on the car. Multiple stages of testing and making sure I'm not locking myself out inbetween, but otherwise quick and simple.

In Use

The lock is a bit fiddly since the key is so bulky. You have to insert the key, hold the cap in place so it doesn't turn, turn the key to unlock, then turn the cap with the key in the cap. As said, fiddly, but perfectly doable. Would have been nicer to have the outer door included in the central locking, but hey, we get what we pay for (or ask for, if enough people complained about this, Jeep would include it, but people seem to be ambivalent about this in the US – not so much in Europe, never seen a vehicle with non-locking cap there).

Overall

Quick and easy, should have been included from stock, should be able to remove key when unlocked to make it less fiddly.

Rating: 3.5/5 – would install again, but could be better


Building an "Off-road Camper"

With the lessons we've learned over the last few years with car camping, truck camping, trailer camping, etc., we are currently on a path to build another "offroad camper". I don't want to call it an overlanding vehicle, since this horse has been beaten to death and there is a vast spectrum what people understand overlanding to be.

For us, "off-road camping" means, we can camp in places, where typical cars and vans generally don't venture. Mostly due to ground clearance, lack of proper four wheel drive, tires, etc. We love being away from the RV crowd. We absolutely detest RV parks in the US, they are mostly expensive, disgusting, and filled with huge monstrosities that either have their air conditioning or their heating systems blasting at ear splitting levels. Plus they generally get packed wall to wall – and that's no joke, there sometimes isn't even a meter or two between them in "more interesting areas".

Since we have traveled a bit now with various setups, we have come up with a few requirements and wishes for our travel rig.

 Requirements:

  1. Comfortable seating. Given that we often travel long distances, a comfortable cabin and seating is important.
  2. A quick sleeping setup. When arriving late at a camp site, it is important to us that we don't have to deal with lots of work to have a sleeping arrangement ready. A minute or two, not more.
  3. A quick and convenient awning. Setting up an awning should be quick and easy, otherwise we won't use it.
  4. Inside space. In incliment weather and with nasty insects (mostly wasps) around sometimes, we'd like to have a space to sit inside. It doesn't have to be big, just something where we can sit and chat, have a tea or coffee or a quick breakfast in the morning, etc.
  5. No towing. Towing has turned out to be not a good idea for us personally. Turning around on a trail, if it turns out harder than we want to deal with, is a total nightmare. The 4Runner was an abysmal tow vehicle. The engine has zero torque in lower rpm and the automatic gear box was garbage. The Patriot X1 was incredible once it was set up, but it was a chore to get it set up and packed away every day.
  6. Some off-road capabilities. We don't need all that much here, we use this for traveling, not rock-crawling, desert racing, or trail tackling. It's a way of getting just a little farther in on a trail, away from the most annoying crowds. The 4Runner was more than good enough for that.

This didn't leave us with much choice, since the vehicles that could be used for this, are very limited in the US. There are no old Land Rover Defenders or Toyota Land Cruiser Troopies, which could be converted. These vehicles basically don't exist here and while some of them can be imported (as classic cars), we didn't want to deal with that. A converted Jeep Wrangler was an option, but it is very, very small. 

We ended up with a Jeep Gladiator and an Alu-Cab Canopy Camper on the rear. It's not an easy build-out and it's right on the edge of the laughable load limit of the Jeep, but it was one of the very few options for us. We did not want another Toyota, we didn't want a massive truck, so options were limited and we picked the one that fit our ideas best. 

Jeep Gladiator Rubicon – 3.0L EcoDiesel

16 May 2022

How to register a Patriot Camper Trailer in California

If you want to buy a camper trailer out of state and are wondering what to do about registering it in California, here are the steps:

  • Pick up from out of state – obviously ...
  • Fill out Reg 343 for California's "Application for Title or Registration", a Patriot Camper trailer is considered a "trailer coach", get the rest from the paperwork. Fill this form out at home, that'll make the person at the DMV much happier, but don't sign at home, sign it at the DMV, don't know whether this is necessary, we've did it this way).
  • Go to your preferred DMV (tip: check Google for one that has decent reviews in your area, you don't have to go to the closest one).
  • Have the trailer inspected (they check VIN, size, other data against the paperwork you get when buying the trailer).
  • Sign the paperwork when and where they tell you.
  • Ask to get a title in your name.
  • Pay sales/use tax.
  • Done!

It was actually a super simple process, we were concerned  about the various different forms floating around, but it was quick and painless. 

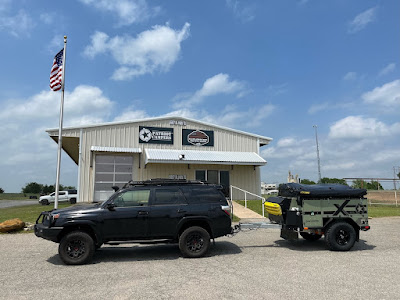
Picking up our new trailer


18 October 2020

CC20 - Day 35 – Back Home

Today was the last day of my cross-country ride. Sunnyvale to the East Coast and back. It was a great trip! Yesterday I met up with Andrea and we rode the last section together. Along the Pacific Coast Highway from Santa Maria to Sunnyvale, CA.

California Backroads, near Paso Robles

We started with a nice section going from Paso Robles to Cambria. Then on Highway 1 along the coast. Weather was like it so often is along the coast:

Fog along PCH

It was foggy and wet most of the way close to the ocean. Whenever we were more inland, it was sunny and warm. 

A short stop along the way

Fog rolls in

A few hours later we reached our home, from where I had left exactly five weeks ago.

Back home

My route took me 15.430km or 9588 miles across the country. One rear tire change, one service (12k miles), thousands of splattered bugs, lots of curvy roads, endless miles across straight roads, long days, interesting days, and countless memories! 

CC20 - The Full Route

Proof ...

Home, Sweet Home

And here's the last route picture. Day 35, fives weeks after leaving.

Route Day 35


17 October 2020

CC20 - Day 34

Artistically not a great photo – but it was soooooo good to see my lovely wife again! I didn't ride today, but Andrea did. She came South on the Pacific Coast Highway and met me here in Santa Maria, CA.

Together again

Tomorrow we'll ride home, probably the same route she took today, just the other direction.

Andrea's Route


16 October 2020

CC20 - Day 33

Second to last riding day – tomorrow I won't be riding, just waiting for my wife to arrive here. I rode through some burned and non-burned landscape today, it was very interesting to see how fast nature is already taking over again. The burned areas (not from this year though) were sprinkled with fresh green everywhere. It gives hope!

Burned California Landscape

More ...

Overall, it was a good day. I rode about a mix of maybe 60:40 straight roads and twisties. While I'd love to have a more twisty mix, it's hard to achieve during a trip like this.

Route Day 33


15 October 2020

CC20 - Day 32

Since Andrea and I agreed to meet up in Santa Maria, CA, and I wanted to have one day without riding in the next few days, I had some options: I could ride from Palm Desert to San Diego, stay a full day to have the non-riding on Friday and then head North to Santa Maria, or, option two, ride towards Los Angeles on some nice roads, stay overnight somewhere, ride to Santa Maria and arrive a day early and take my non-riding day on Saturday.

This morning I decided to take option two. Part of it was that I wanted to ride Angeles Crest highway again tomorrow, this time East to West, but I hadn't planned with fire related road closures (welcome back to California). So, I'll plan some mixed riding for tomorrow to get to Santa Maria.

Today I had a beautiful riding day, wonderful roads, it's really worth taking a closer look at the map and zoom around in it on Google Maps.

I took only one photo while being stopped at one of four one-lane road construction stops:

Typical California Mountain Landscape

It was a very hot day, even in the mountains it rarely dropped below 30C/86F, so I wasn't all too inclined to stop in the sun (not much shade here) and take photos. I'm in GoreTex gear and stopping in this heat feels like I'm wearing a non-ventilated plastic bag ... while riding it's okay with the air moving, but even traffic lights are not nice.

Route Day 32